Stages
(edited from an article in Artist’s Palette Magazine 2016 issue 148)
Although I also paint landscapes and interiors I am most at home painting still-life and portraits which have a lot in common. This means that I never have to worry about weather conditions and changing light and, for still-life, I can leave my setup for as long as it takes to complete the painting. I am also completely in control of the composition, the lighting, and the arrangement of tone and colour. I have a huge collection of glasses, bottles, crockery, pots and dishes which I find in op-shops and charity outlets. There is always a supply of fruit and vegetables at hand and various cloths and fabrics. Some objects seem especially suitable for painting and as a result are quite often re-used. In fact, I have painted the same Asian vase used in this demonstration in many different settings and always find some new aspect or feature each time I look at it.
SET UP
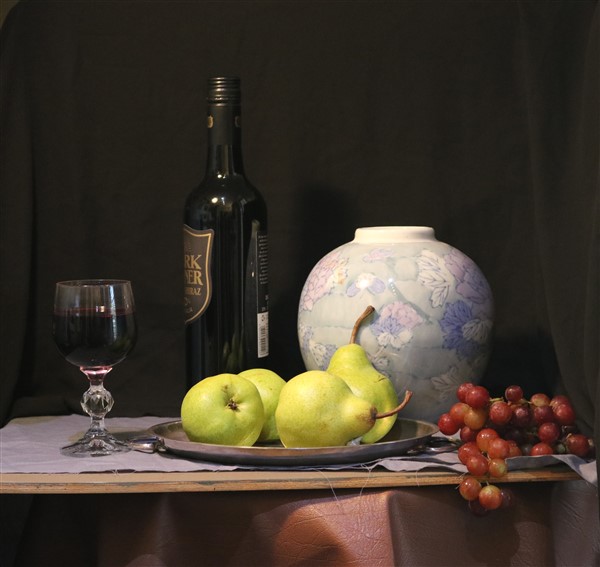
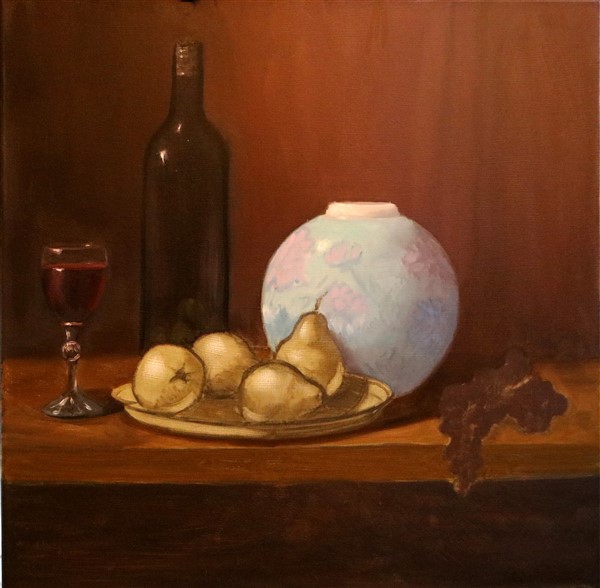
This is a view of the set up that I used for this demonstration. I have chosen a fairly traditional still-life setup with the objects arranged in a triangular shape. My aim is to direct the eye with the light coming from the left and increasing as the focal point of the Asian vase is reached. The grapes act as a stopper at the edge of the canvas. I set up my still-life in my studio taking plenty of time to make sure I’m happy with the composition. I may take one to two hours arranging everything to my satisfaction. Although I paint from life, I photograph my set up so that I can re-position any objects that need replacing, such as the grapes which go into the fridge at the end of the day. If you use a spotlight as I do, the heat makes pieces of fruit go off very quickly.
STEP 1
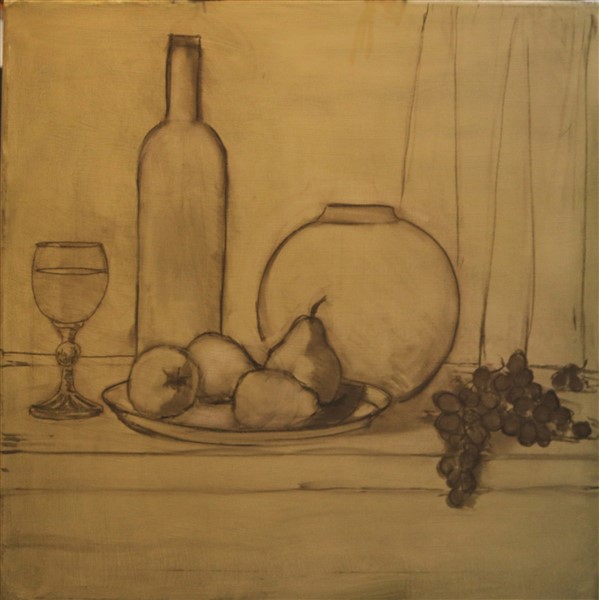 I start off by painting a thin ground colour of very pale green-grey to kill the white of the canvas and then I draw in my composition with vine charcoal. Drawing with charcoal allows me to easily correct the drawing as I go along.
STEP 2
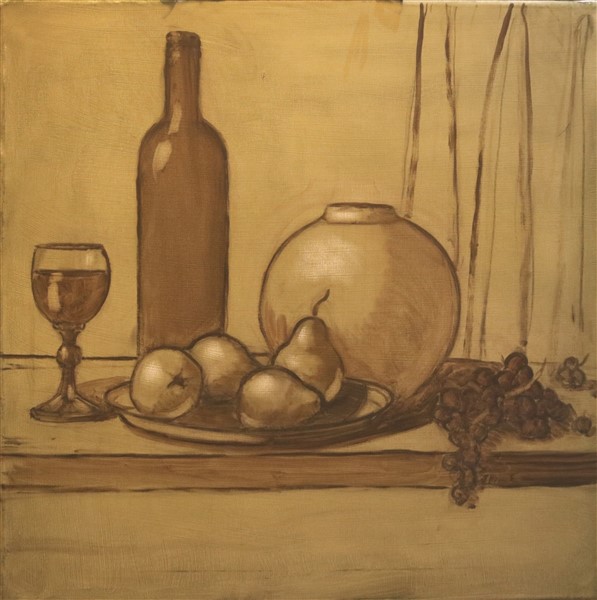 Having lightly dusted off my drawing lines to leave a very faint image, I now use my small round brush with thin raw umber to go over my drawing . I have also put in some darks on the glass, bottle and grapes and the shadow side of the pears and vase. At this stage I am only using odourless solvent to thin my paint .
STEP 3
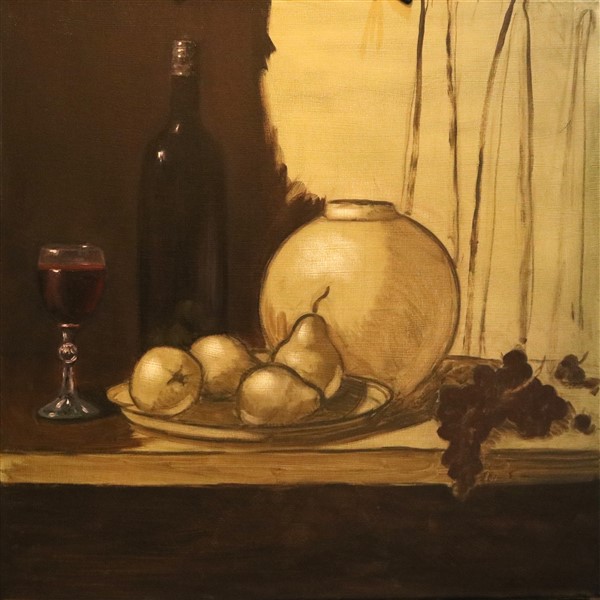 The following day I start to paint the background on the left around the glass and bottle using a very dark mixture of Alizarin and phthalo green ( almost black) and burnt umber and at the same time paint into the glass with alizarin and a touch of ultramarine blue. The bottle is painted with the same mixture of alizarin and phthalo with the green now more dominant. I use a large bristle filbert (10) for the background and smaller size filbert (6) for the bottle and glass and am not very concerned with accurate edges at this point. I am still only using solvent but the paint is a bit thicker.
STEP 4
 I complete the background adding burnt sienna and yellow ochre to the mix to gradually go lighter to the right of the canvas and indicate the idea of cloth folds. The vase now receives the first coat as does the shelf, using the same brushes as before. I am still only using solvent with some thicker paint and some of the objects start to look more complete.
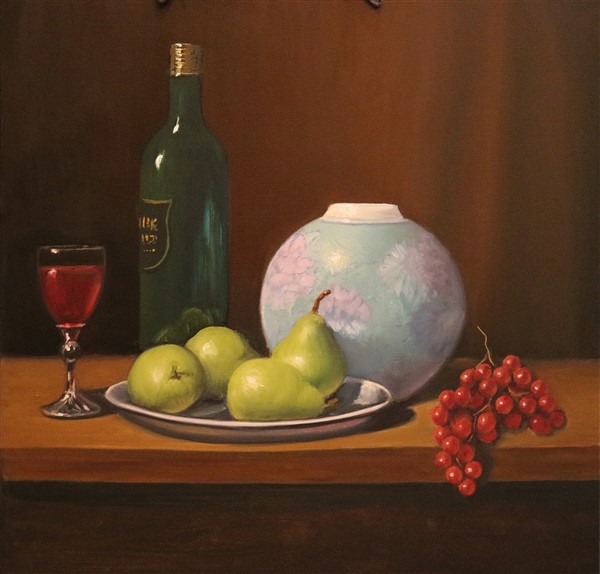
STEP 5
 In this step the pears, dish and grapes are painted using the same brushes plus a small taklon filbert (6) for the grapes: the whole canvas has now received the first layer of paint and I leave it for 24 hours.
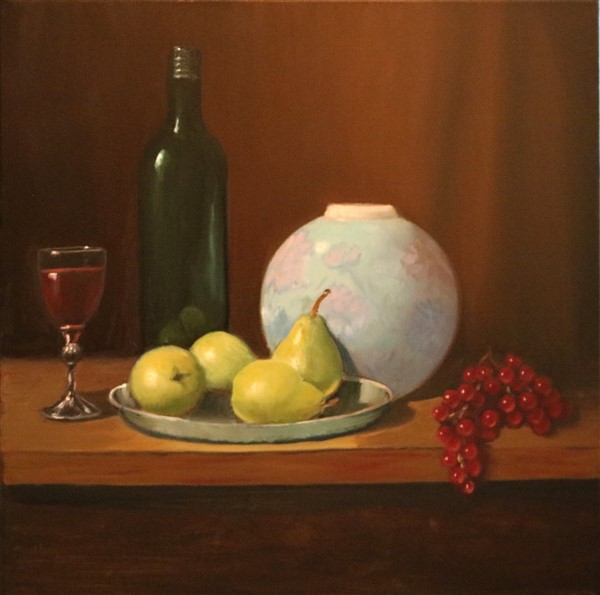
STEP 6 and 7
 This stage consists of refining what has gone before now using a mixture of 50% oil and 50% solvent to bring each area to near completion: I also decided to add a few grapes to the far right of the composition. The background is reinforced at the same time that each object receives it’s final layer of paint with particular care being careful of the edges to maintain good shapes. I am still using the same brushes as before with the addition of size 2 and 4 synthetic filberts for the details. Adding the highlights really gives everything a lift and increases the three dimensionality.
FINAL STEP 8 Asian Vase and Pears
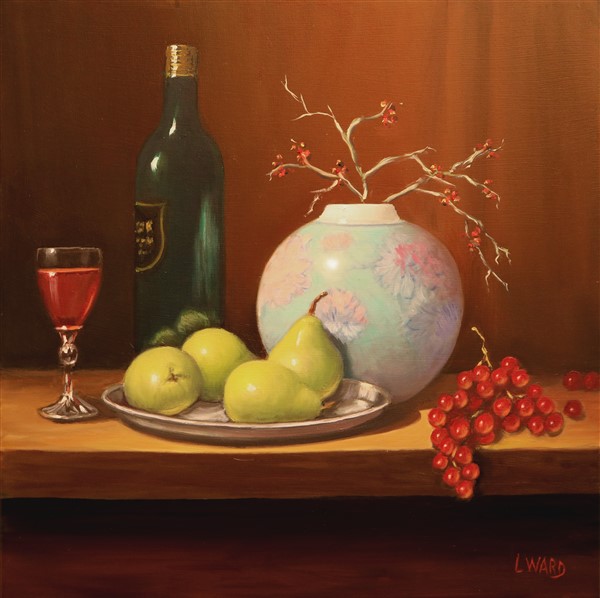 In this final stage I look to see where I can emphasise the darks, the lightest lights including the highlights. I check my edges, where I need to make them sharper or lost and make sure my shapes are accurate. I decided to put in some small twig like stems in the vase to take the eye down towards the grapes and finally add my signature.
How do I know when to stop? It is said that a painting is never finished but abandoned: when I can think of no other brushstroke that will improve it I know it is time to stop fiddling.